
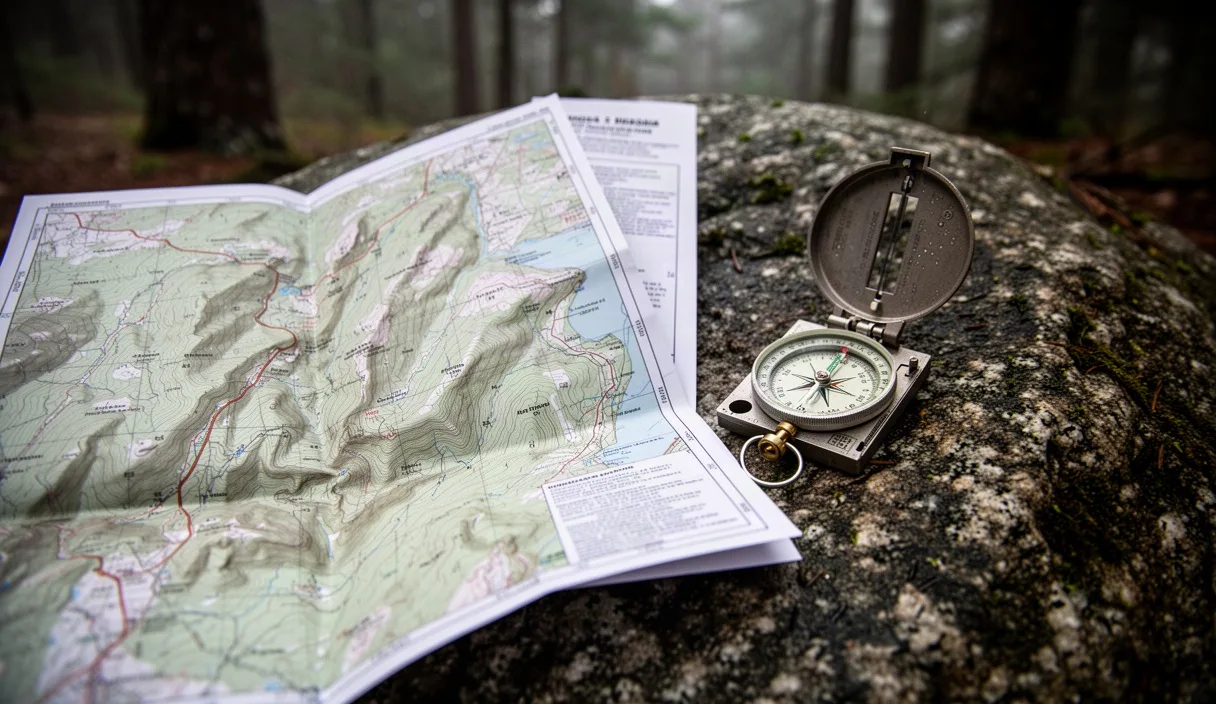
Paper topographic maps do not lose battery power or shatter against granite boulders. When heavy forest canopy blocks satellite reception, a paper 7.5-minute quadrangle paired with an adjustable baseplate compass provides reliable positioning. Forest navigation requires reading subtle terrain cues through the tree cover, calculating your elevation changes before you climb, and recognizing landforms from line patterns drawn on a flat grid.
Every navigation error in the backcountry compounds over distance. Walking 400 meters in the wrong direction through dense timber, alder thickets, or blowdowns can consume an hour of daylight and hundreds of calories. Learning to interpret contour lines, compute slope angles, compensate for magnetic variation, and align paper to ground keeps you on track without guessing.
Reading Contour Intervals and Slope Density
Contour lines connect points of equal elevation above sea level. Every topographic map specifies a contour interval in its legend, usually located at the bottom center of the sheet. On standard United States Geological Survey (USGS) 1:24,000 scale quadrangles, this interval is commonly 20 feet or 40 feet, though high-relief mountain maps may use 80-foot increments, and flat coastal maps may use 5-foot or 10-foot intervals. Always verify the interval before measuring elevation changes; assuming a 20-foot interval on a 40-foot map cuts your calculated climb in half.
Index contours appear every fifth line as a heavier, darker line printed with an explicit elevation number. If you see an index contour marked 3,200 feet and the next index line downhill is marked 3,000 feet, the total drop between them is 200 feet. Count the four intermediate, lighter lines between them to confirm the math: five intervals across 200 feet equals a 40-foot contour interval. When terrain drops rapidly, intermediate contours bunch together, creating a thick band of brown ink that warns of vertical bluffs or steep drop-offs.
| Map Scale | Contour Interval Range | Ground Distance per Map Centimeter | Best Terrain Application |
|---|---|---|---|
| 1:24,000 (USGS 7.5-min) | 20 to 40 feet | 240 meters (787 feet) | Dense timber, off-trail navigation, complex ridgelines |
| 1:50,000 (USGS / NRCan) | 10 to 20 meters | 500 meters (1,640 feet) | Multi-day backcountry routes, broad plateau travel |
| 1:63,360 (USGS 15-min) | 50 to 100 feet | 633.6 meters (2,078 feet) | Historic wilderness travel, regional forest corridors |
Slope density reveals the physical effort required on trail. To calculate a slope percentage from your map, divide the vertical rise by the horizontal run, then multiply by 100. For example, if a trail climbs across six 40-foot contour intervals (240 feet of rise) across a map distance of 0.25 miles (1,320 feet of run):
- Rise: 6 lines multiplied by 40 feet equals 240 feet.
- Run: 0.25 miles equals 1,320 feet.
- Math: 240 divided by 1,320 equals 0.1818, or an 18.2 percent grade.
A trail grade between 5 percent and 10 percent allows comfortable walking with a 35-pound pack. A grade above 25 percent forces switchbacks, loose footing, and frequent rest stops. If contour lines merge into a solid line, you face a cliff band that is impassable without technical climbing gear.
Adjusting Compass Declination for Your Region
True North points to the geographic North Pole, where lines of longitude converge. Magnetic North is the shifting point in the Canadian Arctic where the planet's magnetic field points downward. The angle between these two lines at your exact field location is the magnetic declination. If you fail to adjust for declination, your field bearings will drift off course by hundreds of meters for every kilometer traveled.
Check the declination diagram printed in the bottom margin of your map. The diagram displays three lines: True North (indicated by a star), Grid North (indicated by "GN"), and Magnetic North (indicated by "MN"). It lists a degree value and an orientation, such as "13° East" or "14° West". Magnetic fields drift over time, so if your map was printed in 1982, the listed value is outdated. Check the National Oceanic and Atmospheric Administration (NOAA) online magnetic field calculator before departing to obtain the current year's declination for your specific coordinate box.
Adjust a mechanical baseplate compass using these actions:
- Locate the tiny brass adjustment screw on the rotating bezel or the underside of the housing.
- Insert the small metal key attached to your compass lanyard into the screw slot.
- Turn the screw until the orienting arrow inside the housing shifts to match your local declination. For 14 degrees West, move the arrow 14 degrees to the West mark.
- Verify that when the bezel reads zero degrees, the orienting arrow stays locked at the correct offset angle relative to the baseplate index line.
If your compass lacks a mechanical set screw, calculate the math manually every time you transfer a bearing. For East declination, subtract the declination value from your field bearing to plot on the map, or add it to a map bearing to hike in the field. For West declination, add the declination value to your field bearing to plot on the map, or subtract it from a map bearing. A simple mnemonic to keep straight in rainy conditions: West is best (add to map), East is least (subtract from map).
Matching Map Contours to Visible Ridgelines
Dense forest canopy blocks wide-angle views, leaving you with small windows through the trees toward rock outcroppings, saddles, and shoulder ridges. Terrain association means matching the distinct shapes you see through these clearings to the concentric loops and curving lines on the paper sheet.
Contour lines form recognizable geometries based on geological shapes:
- Concentric circles or ellipses: Represent hilltops, knolls, or mountain summits. The smallest closed circle marks the highest point.
- Hourglass or saddle shapes: Represent a low dip between two peaks. The contour lines run close together on both sides and spread apart in the middle.
- V-shapes pointing downhill: Represent a spur, nose, or ridge running downward toward lower ground.
- V-shapes or U-shapes pointing uphill: Represent a drainage, ravine, or stream bed where water cuts into the slope.
To pinpoint your location along a trail, take a resection bearing toward a recognizable feature. Find a gap in the trees where a known peak or distinctive ridge crest appears. Hold your adjusted compass level at chest height, point the direction-of-travel arrow at the landmark, and rotate the bezel until the needle sits inside the orienting outline (putting the needle in the box). Read the bearing at the index line.
Place your compass on the map. Align the edge of the baseplate with the mapped landmark, keeping the orienting lines parallel to the north-south grid lines on the map. Draw a fine pencil line along the baseplate edge backward toward your suspected path. Where that line crosses your known trail line is your location. If you are off-trail, take a second bearing to a different visible feature at least 60 degrees away from the first. Where the two lines intersect is your pinpoint coordinate.
Handrail Navigation Along Creeks and Ridges
Walking on an exact compass bearing through heavy timber requires intense focus. Obstacles like downed logs, boulder fields, and swamps push you off line. Handrail navigation eliminates the stress of constant compass checking by using linear land features to guide your travel direction.
A handrail is any distinct linear feature running roughly parallel to your route. Primary natural handrails include perennial creeks, distinct ridgelines, bench edges along slopes, and valley bottoms. Artificial handrails include logging roads, abandoned rail grades, barbed wire boundary fences, and power line clearings. Instead of staring at the needle, you keep the linear feature within sight or sound on your left or right side.
Every handrail strategy requires a catching feature, which is a perpendicular barrier that tells you when you have gone too far. If you hike north along a creek handrail, select a prominent catching feature on your map, such as a major footbridge, an east-west logging road, or an abrupt 400-foot cliff face. When you reach that landmark, stop immediately; it guarantees you do not overshoot your target trail junction or camp location.
When selecting between a creek bottom and an adjacent ridgeline for your handrail, consider the ground conditions. Mountain streams often create tangled alder thickets, steep cutbanks, and slippery footing. Ridgelines offer drier ground, firmer tread, and clearer lines of sight through the trees, though they expose you to wind and lack drinking water. Use the ridgeline for travel speed, and drop down toward the creek only when approaching your destination or collecting water.
Waterproofing and Folding Field Paper Maps
Moisture ruins paper maps within minutes. Heavy rain, wet brush slapping your chest, and sweat inside a pocket turn pulp paper into mush along the fold lines. Standard home printer paper is exceptionally fragile when damp. You must treat standard quad sheets with physical protection or protective coatings before entering the woods.
Three reliable waterproofing methods exist for backcountry use:
- Liquid hardeners: Products such as Nikwax Map Proof or dilute marine varnish soak into the paper fibers without obscuring line detail. Paint the liquid onto both sides with a foam brush and hang the sheet to dry on a line for 24 hours. The treated sheet sheds rain and resists tearing.
- Clear contact film: Apply self-adhesive, matte-finish vinyl laminating film across the face of the map. Squeegee air bubbles out with the edge of a plastic credit card. Matte film allows you to write bearings directly on the surface using a soft 2B pencil or grease pen, which can be erased later.
- Heavy vinyl cases: Roll-top, zip-locking clear map bags made of polyurethane keep dry paper safe in continuous downpours. Fasten the case to your pack straps using small carabiners so it cannot blow away during sudden gusts.
Never unfold an entire 22 by 27-inch USGS quad sheet in the wind. A 20-mph breeze will tear the paper from your hands or rip it along old creases. Fold the map using an accordion fold: fold the sheet vertically into four equal panels, then fold it horizontally into four panels like bellows. Refold the map so the eight-by-eight-inch section containing your immediate travel route faces outward. Slip the folded map into your pocket or clear chest case; you can read the terrain continuously without exposing the rest of the sheet to the elements.
Common Mistakes
Backcountry navigators often repeat the same basic errors when reading topographic sheets in timber:
- Inverting spurs and draws: Looking at contour lines without checking elevation numbers causes hikers to mistake a steep ravine for a ridgeline. Check the numbers: if the "V" points toward higher numbers, it is a water-carved draw; if it points toward lower numbers, it is a dry spur.
- Relying on outdated declination data: Using the 15-year-old declination figure printed in the map margin can introduce an error of several degrees, drifting your location dozens of meters off course over a mile of travel.
- Forgetting horizontal distance scales: Estimating travel time purely on flat map distance ignores contour line compression. A route measuring two miles on the map that crosses 35 contour lines takes significantly longer than four miles across flat river plains.
- Allowing pencil lines to become permanent: Marking lines with dark ink pens ruins the map for future trips. Always use a 2B or HB pencil with light pressure so you can erase bearings and notes without tearing the top layer of paper.
Practical Next Steps
Start your practice in a local municipal or state park with established trails and clear topographic relief. Purchase the relevant 7.5-minute quadrangle or export a custom 1:24,000 scale map sheet from an open-source mapping database. Before leaving home, check the current declination angle for that specific park and lock the offset into your compass bezel using the adjustment tool.
Leave your electronic devices tucked away in your pack as backup tools. Walk a loop trail using only your folded paper map and baseplate compass. Identify every creek crossing, spur ridge, and saddle before your feet reach them. Calculate the elevation change for the next kilometer of trail, time your hike across that section, and verify how the contour spacing feels underfoot. Consistent field practice on familiar ground builds the spatial awareness needed for safe off-trail navigation in remote forest regions.