Drop the car at home. Designing a 48-hour bikepacking loop around regional rail corridors eliminates out-and-back dead mileage while expanding your geographic radius by 80 to 140 kilometers each way. Secondary paved roads, chip-seal spurs, and unclassified gravel ribbons link regional passenger stops to public tracts without forcing highway crossings. The goal is simple: pedal away from a rural platform on Friday evening, run a non-overlapping loop across secondary surfaces, and return to an alternate railhead before the final Sunday commuter sweep.
Tight weekend timetables leave little margin for navigational improvisation. A 48-hour mission demands hard planning around train car bike-hook capacities, county line maintenance shifts, limited rural store hours, and legal sleeping coordinates. Treat the transit ticket as your operational anchor, then build outward using confirmed surface data rather than satellite guesswork.
Mapping Railway Access and Return Terminals
Select regional rail lines that run parallel to secondary road networks, but target different departure and arrival stations to maximize forward momentum. A point-to-point transit ride with an intermediate bicycle loop prevents you from backtracking over depleted terrain. Identify regional trains that permit roll-on bicycle service without complete disassembly. Most diesel multiple-unit trains and regional commuter lines limit roll-on capacity to between two and six bikes per car. Verify whether your transit authority mandates advance reservations for bike hooks, particularly on Friday afternoon and Sunday evening runs.
Choose an outbound drop-off station located beyond the suburban fringe. Starting your ride 40 kilometers outside a metropolitan center cuts through congested arterial roads, delivering your tires directly to secondary chip-seal networks. For your return leg, choose a terminal station that sits one stop up-line from your true final destination. This gives you a recovery buffer: if a mechanical issue or headwind slows your pace by two hours on Sunday afternoon, you can board at the earlier station rather than racing a departure clock down to the wire.
Study the elevation profile between platforms. Starting at an inland station situated on a plateau and finishing at a river valley terminal gives you a net-negative elevation run on Sunday afternoon when physical fatigue peaks and chainrings carry 40 hours of road grit. Check station infrastructure before buying tickets. Rural flag stops rarely feature ticket vending machines, platform covers, or potable water spigots. Confirm whether your arrival terminal requires hauling a 22-kilogram loaded rig up concrete footbridges or narrow underpass stairwells.
| Terminal Strategy | Outbound Platform | Return Platform | Operational Advantage |
|---|---|---|---|
| Linear Offset | Town A (Milepost 42) | Town B (Milepost 78) | Prevents looped road duplication; rides parallel along interior valley. |
| Apex Loop | Small Junction Platform | Same Small Junction | Leaves gear stashed in station lockers; limits transit ticket overhead. |
| Elevation Drop | Highland Foothill Depot | Lowland Valley Hub | Saves legs on Sunday; uses gravity assist toward transit cut-off time. |
Filtering Forestry Tracks from Private Farmland
Satellite imagery lies about access rights. A two-track road visible on an aerial tile often cuts through working cattle operations, leased timber reserves, or private estates where trespassing enforcement is immediate. Cross-reference open-source basemaps with public cadastral overlays and county parcel records before committing your tires to an unpaved line. OpenStreetMap data marked with tags like access=permissive or highway=track requires validation against official county road registers to confirm if the road carries a public right-of-way status.
Federal and state forestry parcels offer dependable transit corridors, but their access boundaries can turn confusing near perimeter sections. Commercial timber operators frequently hold surface rights on land surrounded by national forest boundaries. Look for telltale boundary markers: paint blazes on trunk bark, metal cattle guards flanked by private property placards, or yellow survey ribbons. If a mapped track passes within 50 meters of a rural homestead, assume the boundary has shifted locally, and scout an alternate bypass on an unclassified county road.
Follow a strict filtering procedure when compiling your GPX track across rural counties:
- Cross-check municipal GIS parcel maps for public road designations versus private easements.
- Filter out double-track trails that dead-end at agricultural drainages, quarries, or radio repeaters.
- Flag natural choke points such as seasonal water crossings, gated cattle corridors, and active logging haul roads.
- Establish tarmac bailouts every 35 kilometers to route around blocked forestry tracks or unpassable clay ruts.
Frame Bag Weight Distribution for Rough Gravel
Keep your center of gravity low and centered between the wheel axles. Rough secondary gravel, washboard descents, and embedded limestone will rapidly expose poor load balancing. Overloading the front handlebar roll dulls steering responsiveness on loose gravel corners, while an oversized, heavy seat pack induces lateral sway whenever you stand on the pedals to climb steep grades.
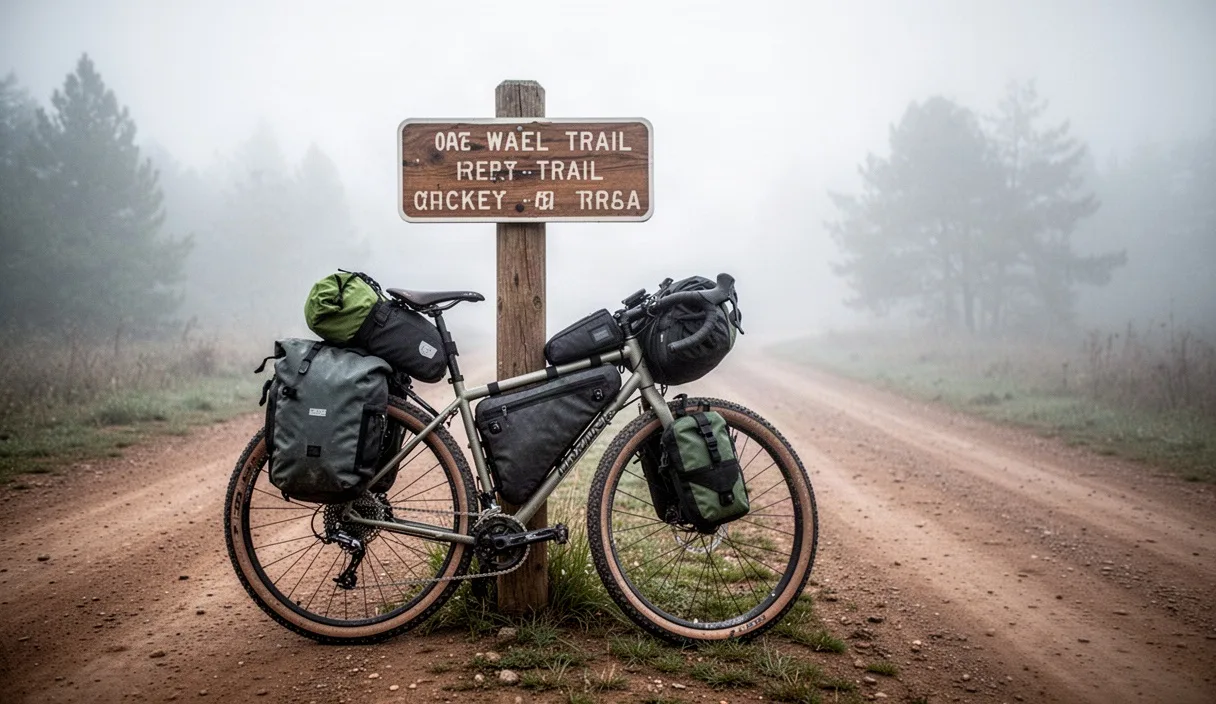
The central frame triangle represents prime real estate for your densest items. Position your water bladder, heavy tools, spare tube bundle, chain breaker, and dense rations inside a custom or properly fitted production frame bag. Place the heaviest mechanical components along the bottom of the triangle, resting directly above the bottom bracket shell. This placement dampens vibration and preserves the natural handling characteristics of your bicycle frame geometry on rough terrain.
| Pack Location | Target Load Share | Approved Contents | Handling Impact |
|---|---|---|---|
| Frame Triangle | 42% of total gear weight | Water reserves, steel tools, pump, spares, dense food | Stabilizes bike over ruts; anchors center of mass. |
| Front Handlebar Roll | 23% of total gear weight | Ultralight sleeping bag, shelter fabric, down jacket | Preserves wheel tracking; avoids high-speed wobble. |
| Rear Saddle Bag | 25% of total gear weight | Spare clothing layers, dry sleep socks, bivy bag | Minimizes tail pendulum sway during out-of-saddle climbs. |
| Cockpit / Top Tube | 10% of total gear weight | Electronics, power banks, day nutrition, first-aid pack | Keeps immediate route-finding gear accessible on the roll. |
Distribute secondary gear outward to the extremities only after filling the center frame triangle. Pack your down sleeping bag and ultralight shelter inside a waterproof drybag secured to the handlebars with rigid mounting brackets. Ensure at least three centimeters of tire clearance remains when the fork compresses under road shocks. Reserve the seat pack for high-volume, low-density goods: thermal layers, spare riding bibs, and an inflatable sleeping pad. Cinch all side compression straps completely to eliminate pack wag before rolling off.
Resupply Windows in Rural Municipalities
Rural stores keep unpredictable, restricted trading schedules. Unlike urban 24-hour service stations, an unincorporated crossroads market may shutter by 13:00 on Saturday and remain locked through Monday morning. Never plan a critical water or calorie resupply based on an unchecked map icon. Telephone rural general stores, post offices, and agricultural fuel hubs directly during the week preceding your trip to confirm their operating hours for the coming weekend.
Calculate your intake requirements at 3,200 to 4,600 calories per day, depending on total climbing meters and pack tonnage. Secondary unpaved roads demand 25% to 35% more metabolic effort than smooth pavement at the same ground speed due to surface rolling resistance and loose rock deflection. Carry dense, packable items that hold up against road shock: salted nuts, hard cheeses, flatbread wraps, and dried fruit. Avoid items that melt under direct sun or turn to structural powder inside a vibrating frame bag.
Water access requires defensive planning. Plan on consuming 600 to 900 milliliters of liquid per riding hour in mild conditions, and up to 1,200 milliliters per hour during high-temperature gravel climbs. Identify fallback municipal spigots along your path: rural cemeteries, exterior spigots on public park pavilions, community fire stations, and churchyard faucets. Always pack a compact hollow-fiber membrane filter and chlorine dioxide purification tablets to treat raw water from livestock-adjacent streams or agricultural runoff zones.
Legal Wild Camping Criteria on Public Land
Locating an overnight spot on public rights-of-way requires strict adherence to jurisdictional codes. Unregulated wild camping is unlawful across extensive sections of private and state-managed property. Direct your route planning toward designated public land classifications such as Bureau of Land Management parcels, national forests, crown lands, or state conservation zones that explicitly permit dispersed wild camping. For definitive regulatory criteria on specific parcels, consult local public lands authorities or district forest rangers directly, as local fire codes and seasonal bans frequently alter published access policies.
When pitching a dispersed site, follow proven low-impact criteria:
- Distance yourself at least 60 meters from secondary road corridors, forestry trails, and designated trailheads to maintain visual discretion.
- Camp at least 60 meters away from natural water sources, creeks, and livestock tanks to protect riparian margins and avoid animal highway corridors.
- Select durable, non-vegetated surfaces including compacted dirt, gravel bars, or dry pine needle beds; never trench or clear ground vegetation.
- Pack out all food waste, scrap packaging, and personal refuse; human waste must be buried in a cathole dug 15 to 20 centimeters deep in organic soil, minimum 60 meters from any aquatic ecosystem.
Maintain complete acoustic and light discipline throughout your overnight bivouac. Avoid large campfires; rely instead on a regulated canister stove to boil cooking water, or complete your warm meal at a roadside pull-off two hours before turning into your true sleeping area. Pitching your shelter just before dusk and packing out at dawn reduces external encounters and preserves undisturbed wildlife movement across the sector.
Common Mistakes
Do not let minor miscalculations unravel your 48-hour loop. Watch for these recurring errors:
- Over-optimistic speed averages: Planning for 22 km/h on washboard gravel roads instead of a realistic 14 to 16 km/h loaded gravel pace.
- Ignoring wind corridors: Mapping long, unsheltered Sunday afternoon segments directly into seasonal agricultural head-winds on secondary plateaus.
- Missing rail return cut-offs: Targeting the absolute final Sunday train without leaving an intermediate schedule option for mechanical failures.
- Carrying loose bar gear: Fastening dry bags directly to exposed shift cables and brake lines, inducing line abrasion and erratic derailleur tension.
- Skipping water fallback points: Relying completely on a single rural grocery store without verifying whether its outdoor spigot is pressurized after hours.
Final Preparation Checklist
Validate your route files 48 hours prior to rollout. Load your GPX loops onto your primary handlebar GPS and mirror them to an offline-capable smartphone mapping application. Check local municipal emergency notices for washed-out forestry bridges, unpaved road grading work, or seasonal fire bans that restrict canister cookstoves. Buy your passenger rail tickets, confirm bike hook reservations, and verify that your selected stations operate during weekend service cuts.
Pack your kit systematically on Thursday evening. Weigh your loaded bike and record the balance: the front wheel should lift cleanly off the ground when you hoist the bicycle by the top tube, indicating that the weight centers over the bottom bracket rather than dragging down the handlebars. Check your tubeless sealant levels, clean your chain plates, inject fresh lube, and verify your tire pressure using a digital gauge. Set your departure alarm, stage your cycling kit at the front door, and be on the platform 20 minutes ahead of the outbound departure whistle.